brilliant bash

top party possibilities

Brilliant Bash: Big Balloon Birthday January 27, 2011

Kori from Paper and Pigtails recently designed a gorgeous balloon-themed first birthday for her son Holden.  Wow.  What a fabulous party she created!

The cool blue hues, show-stopping desserts and huge round balloons make this a party that could work for children of many age groups and could be done at home – with help from Kori’s paper designs, of course.

What Kori had to say about her bash:

“I really wanted a sweet, simple, and traditional theme. You can’t get much more “traditional” than balloons, but I knew I should stick with a few colors to keep it sweet and simple. I created the invite first and built the whole party around it! I found large 36″ balloons online in our colors [you can find them here], used white and light blue table coverings, and did simple decorations throughout the house.  We cut large circles from scrap booking paper and added yarn to make it look like balloons sticking on the walls, and used yarn as the “balloon strings”.

It was mid afternoon, so we were able to keep the food to a few young age snacks and desserts (mostly). We played a game of pin the string on the large balloon circle cut outs and the kids loved it!

All in all, it was an amazing day with amazing friends and wonderful family and we have plenty of photos to show my little guy as he gets older.”

Vendors:

Photography – Courtney Vickers

All Paperie Designs – Paper & Pigtails

Large Balloon Cookies – Bees Knees Creative

Small Sugar Cookies – Better Bit Of Butter

Large BalloonsBalloon Dealer

Table Runners – Straight Stitch

Return to Brilliant Bash or visit the boutique


Brilliant Bash: Bubblegum & Soda Pop Birthday November 22, 2010

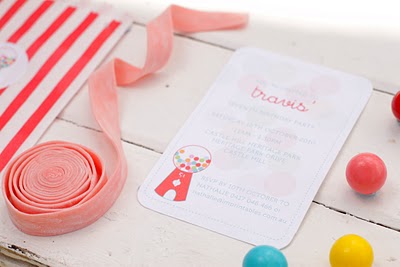
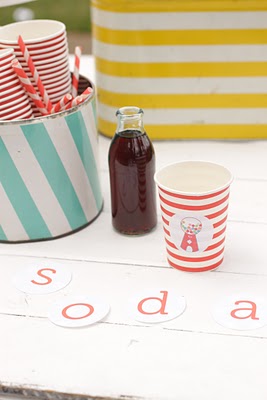
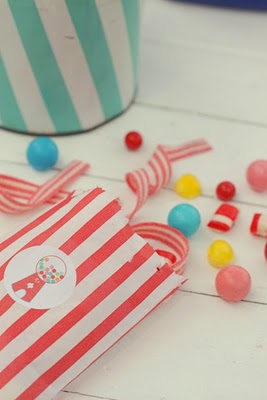
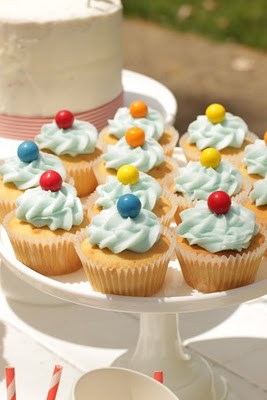
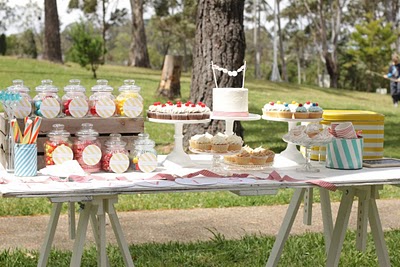
The Australian party stylists at Scissors.Paper.Cake have done it again.  Their parties are fresh and fun, and this Bubblegum and Soda Pop party is no exception.  With paper goods created by Imprintables, and lots of sweet treats for the kiddies (cupcakes by Hello Naomi), this bash looks like such a blast.

Cute Invitations

Tasty Theme

Love the colours

Cupcakes by Hello Naomi

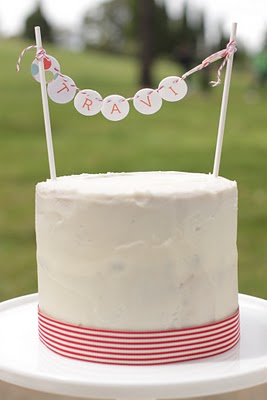
Cake Bunting

Fab Table

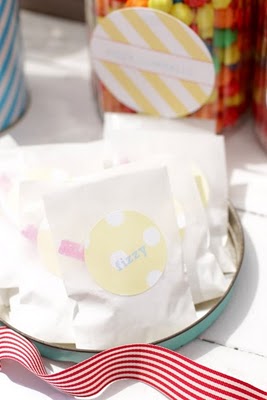
Fizzy Favours

Well done, Scissors.Paper.Cake. I especially love the gumball machine motif used throughout, and the red and aqua colour palette is bright and fabulous.  Love it!

Photos Courtesy of Imprintables

Return to Brilliant Bash or visit the boutique


Brilliant Bash: Melanie & Andy’s Wedding October 13, 2010

Melanie and Andy were married in Lincoln, England in May 2009.  Their fun, vibrant colour scheme and use of bold print is unlike any other wedding I’ve seen to-date.  With lots of polka dots, stripes and damask, Melanie’s event design resulted in a hip, modern twist on the traditional.

Melanie is a very close friend of mine and I have always admired her chic, sassy style.  I’m not doing the stationary justice here, but her invitations, Save the Date cards, and RSVP cards were cute and colourful, and they aptly set the tone for their unique bash.  With their ceremony set in a rustic English castle and their reception offered at a new boutique hotel, Melanie and Andy’s wedding perfectly melded the traditional English countryside with a modern urban flair.


Melanie & Andy's Invitation (Front & Back)


Gorgeous Red Bouquet


Ceremony Venue


The Wedding Party


The Girls


The Beautiful Modern Bride


Down the Aisle


The Kiss


Married!


Love all of the red!


Cake Cutting


Cake!


The Happy Couple


Loving it!


Reception Centrepieces


Favours


Pimms & Lemonade


Homemade Seating Chart


Head Table


Cheers!


The Ladies


The Gents


Melanie’s thoughts on her big day:

Our photographer was Andrew Fletcher. His approach is to take photos when people are in the moment rather than doing a lot of staged photos, and the results were amazing, however, I do wish I had a few more posed portraits taken.

Our colour scheme was inspired by a trip to the Kate Spade store in Boston. We loved all of the heavily saturated hues and the sort of fun, tongue-in-cheek approach she takes to her designs. We carried the theme through in the save-the-date cards, invitations and RSVPs (all designed by my friend Lisa, who is a fantastic graphic designer), the flowers, and the decor at both Tattershall Castle and The Charlotte House Hotel.

For our attire, we both wanted to have a vintage feel.  I went with a floor length gown from J. Crew. I loved all of the silk tulle layers – it made me feel kind of like a ballerina. To complement the dress, I went with long pearls, a beaded jacket and a fascinator which I partially got from Etsy (the small pearl and feather centre) but took to a milliner in Winchester to build it out a bit more with silk. Andy’s suit was very slim cut and I picked out the DAY Birger et Mikkelsen red and white striped tie. Andy wasn’t convinced by the tie at first, but looking through the photos it made our outfits, bringing out the colours in our flowers and tying (pardon the pun) everything together.

We wanted our wedding to feel special not only to us, but for our guests as well.  The castle provided the perfect backdrop for the ceremony, as it was so old and a bit rustic. All of the rooms were predominantly stone which meant that there would be no clashing with our colour scheme. We served wedding cake and champagne immediately following the ceremony so that everyone could have a little celebration while the photos were taken.

We then whisked everyone off to the reception at The Charlotte House Hotel, a boutique hotel in the centre of Lincoln. It was really important to us that the reception have a dinner party feel to it. I wanted everyone to mingle and mix and the food had to be incredible. When the guests arrived, they were greeted with Pimms and lemonade before sitting down to dinner. My father-in-law created the quirky school chalk board with the seating arrangements, and Andy and I created the polka dot table runners and favour tags. Eating outside in the sunshine was my dream come true and everyone seemed to have are really fun time. Best day ever.

Photos by Andrew Fletcher

Return to Brilliant Bash


Invitation & Stationary Vendor Spotlight: Laura K Design August 26, 2010

While perusing the internet for some Toronto-based bash invitation suppliers, I came across the local papeterie of Laura K Design,  who creates beautiful, custom paper goods.   I fell in love with these cherry blossom invitations and coordinating seating charts.

Cherry Blossom Invitation - Laura K Design

Cherry Blossom Seating Charts - Laura K Design

And these wedding invitations are completely different from anything I’ve ever seen:

Masculine Invitation - Laura K Design

Winter Wedding Invitation - Laura K Design

Aside from creating gorgeous wedding paper goods, Laura K Design produces corporate stationary and accoutrements, as well baby shower invitations, announcements, envelopes and seals.

Helicopter Birthday Invitation - Laura K Design

Lady Bug Birth Announcement - Laura K Design

Envelope Seals - Laura K Design

LOVE her work!  I’ll be checking Laura’s website in the future to see what else she has in store for us.  Quotes for Laura’s work are available via her website here.

Do you have any local papeteries you absolutely love?

Photos Courtesy of Laura K Design.
Return to Brilliant Bash
 

Real Bash: Superhero Party

“Super Max” was a very lucky boy on his birthday.  Scissors Paper Cake recently designed a fabulous yellow and black Superhero Party for the little guy.

Superhero Spread

Look at all of the goodies!

Superhero Invitation

Power Popcorn

Loving the milk jugs for lemonade

Candy Jar Bar

Fab Favour Bags

Fun and Festive Favour

Super Balloons!

Invitations and party paper were created by Imprintables, with custom cupcakes, cookies and various printed treats created for the bash by Hello Naomi.

Cookie Lollies

Super Cakes!

Fabulous work, Scissors Paper Cake.  I look forward to seeing more of your fun, stylish bashes!

Photos Courtesy of Hello Naomi.

Return to Brilliant Bash


Picnic Party Invitations August 18, 2010

Filed under: Invitations,Themes — brilliantbash @ EDT
Tags:

So, I decided this past weekend that I’m going to host a Ladies’ Picnic this coming Saturday.  I really wanted to create hard copy invitations for the small list of guests, but due to the short time frame (less than a week), I created hard copy invitations just for the guests I could hand deliver the envelopes to, and a Facebook invitation for the remainder of the guests.

Do you know how difficult it is to find a picnic-themed invitation and red/white gingham ribbon at the end of the summer?  Really, really difficult.  So, I opted for a ladybug notecard and red/white and green/white polka dot ribbon.  Again, just as I mentioned in the vase decoration project, you can do quite a bit with some fabric glue and some ribbon.

I visited the The Paper Place on Toronto’s Queen Street West, and found some cute, red and white polka dot paper.  I bought the notecards, ribbon and photo corners at Walmart, and the envelope labels at Indigo (only available in store).

Invitation Supplies

Creating these invitations was a fairly simple project, and took me about one hour to complete eight invitations.  To try this project for your own event, please follow the nifty instructions below.

Step One: Cut the accent paper (polka dot, in this case) to the desired size.  Use the trusty tacky glue to affix the paper onto the notecard.

Step One: Glue the accent paper onto the card

Step Two: Create the event description (when, where, etc.).  I created mine on a computer and printed it in black and white, but a handwritten version would look nice as well.  Then, cut the description paper to fit within the border of the accent paper.  You can use the tacky glue to affix the second layer of paper, but I opted for photo corners for this project to give the card a cleaner look.

Step Two: Attach event description

Step Three: Decorate the envelope with ribbon.  Cut the ribbon to the desired length and affix one end to the other with tacky glue.

Step Three: Ribbon time

Step Four: Stick a self-adhesive label onto the front of the envelope.  This will cover the ends of the ribbon and will also help to stick the ribbon band onto the envelope.  I wrote the guests’ names in green pen, to coordinate with the colour scheme.

Step Four: The finishing touch

Another colour option

All done!

Please share any invitation ideas you have by sending them to brilliantbash@hotmail.com

Thanks!

Return to Brilliant Bash